 Card Vendor Guides
Getting started
From install to your first buy in four steps.
1. Pick a plan
After installing from the Shopify App Store, the plan picker is the first screen. Every plan starts with a 14-day free trial with Shop-tier features unlocked, so you can feel the whole workflow before choosing.
2. Sync your Shopify snapshot
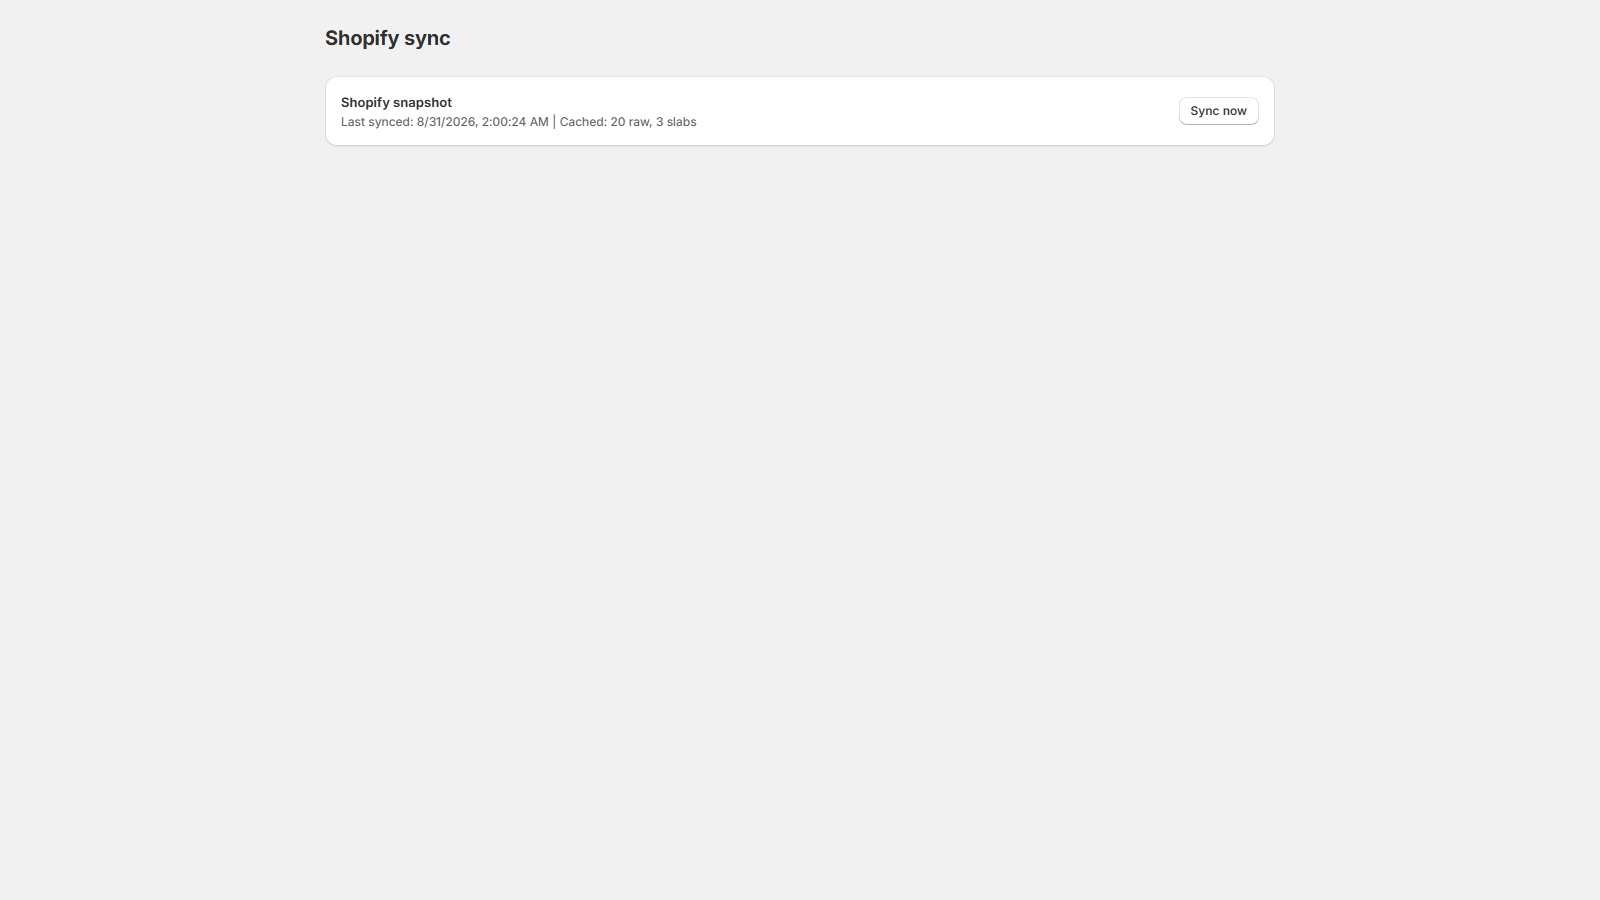
Card Vendor works from a snapshot of your store's products. Open Settings → Shopify sync. The first sync starts on its own when the snapshot is empty or stale, and pages that need a fresh snapshot show a banner that links you here.
- Open Settings → Shopify sync.
- Wait for the walk to finish. The counts update live.
- Re-sync after big changes made outside Card Vendor.
3. Set your buy rates
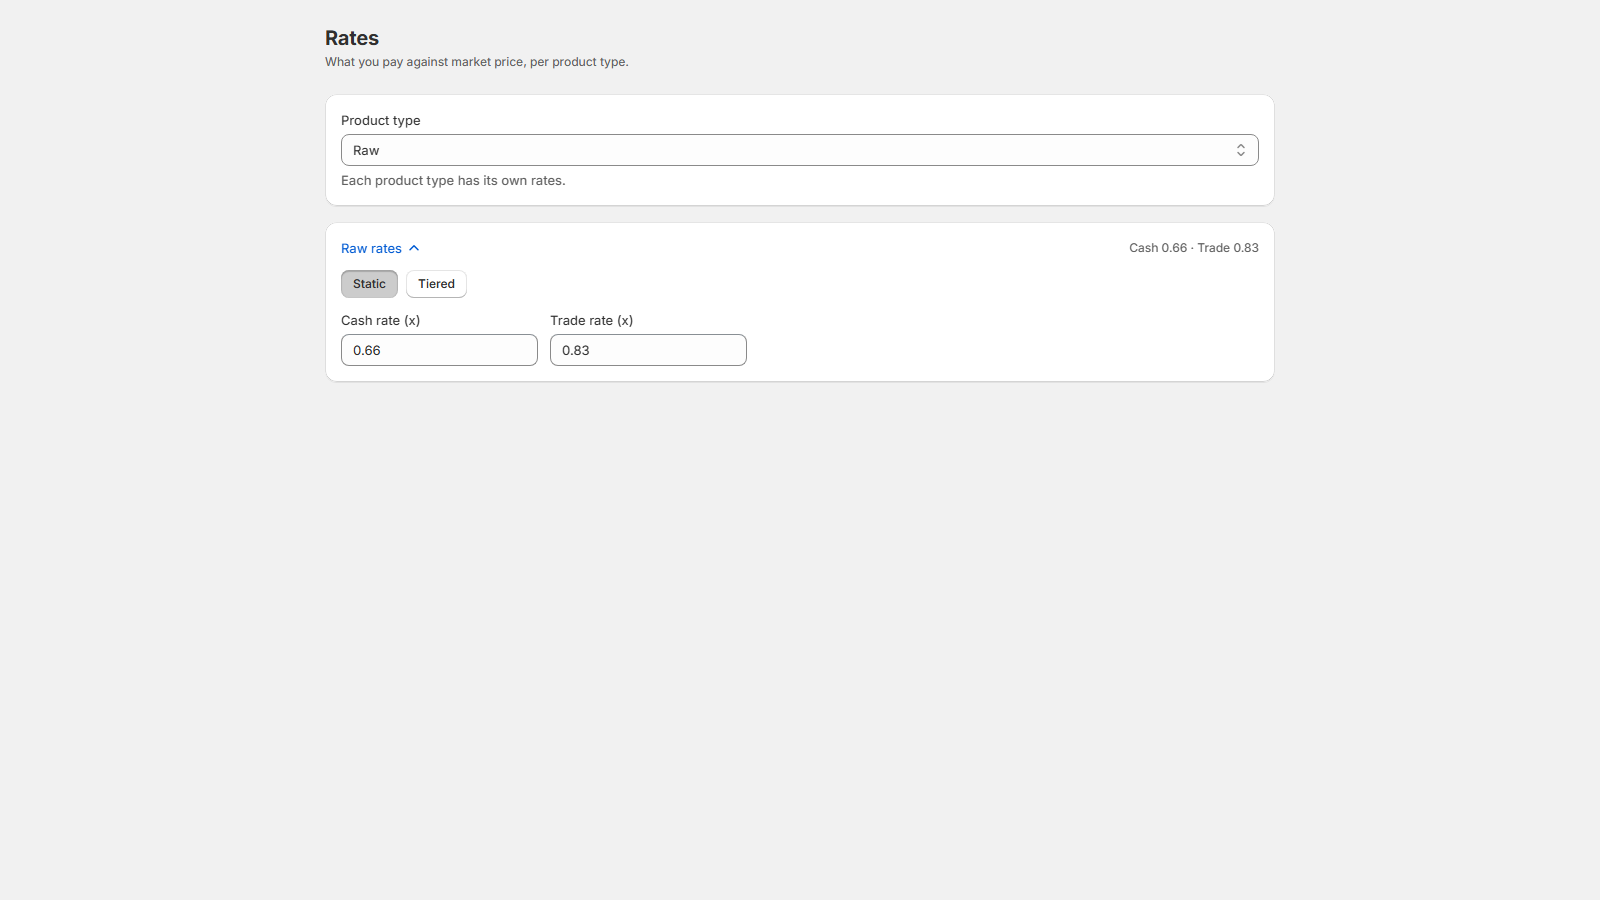
Rates decide what you offer. Open Settings → Rates and set cash and trade percentages per intake type, flat or tiered by price so bulk commons and chase cards get different treatment.
4. Run your first intake
- Open Intake. Opening it once also finishes setup. It records your store's vendor name, which other screens rely on.
- Search a card, click a result to stage it, and adjust condition, printing, or quantity on the staged row.
- Review the cash / trade / market totals, then Create in Shopify.
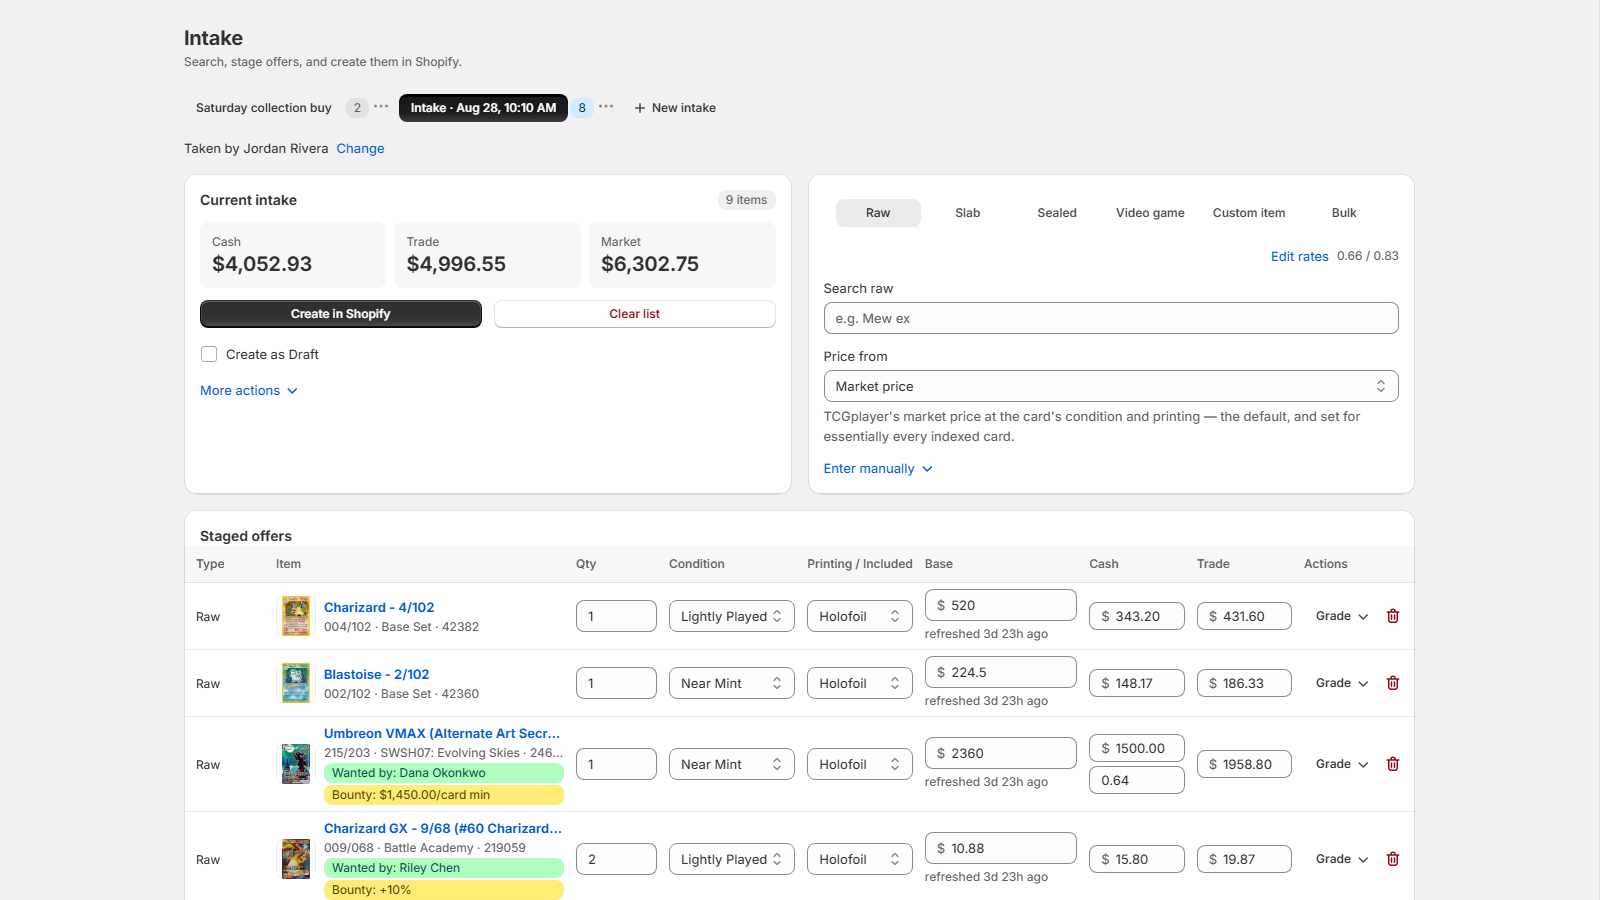
Products are created with the right variant for each condition and
printing, price, cost, quantity, tags, and collection. Check the first
few in Shopify admin to confirm your rate setup feels right.