 Card Vendor Guides
Consignments
The vendor is the consignor. Everything else follows from that.
1. How an item becomes a consignment
An item counts as a consignment when its product vendor differs from your store's own vendor name. The vendor string is the consignor's name; there is no separate consignor record to maintain.
- During a consignment buy, open More actions on the Intake screen and set Shopify vendor to the consignor's name.
- Stage and create the items as usual. Every product from that intake carries the consignor as its vendor.
- Set Shopify vendor back to your store's name afterwards. It carries over to your next intake, and it is also the name consignments are classified against.
If the page says your store's vendor name isn't set yet, open Intake once. That records it.
2. The consignor view
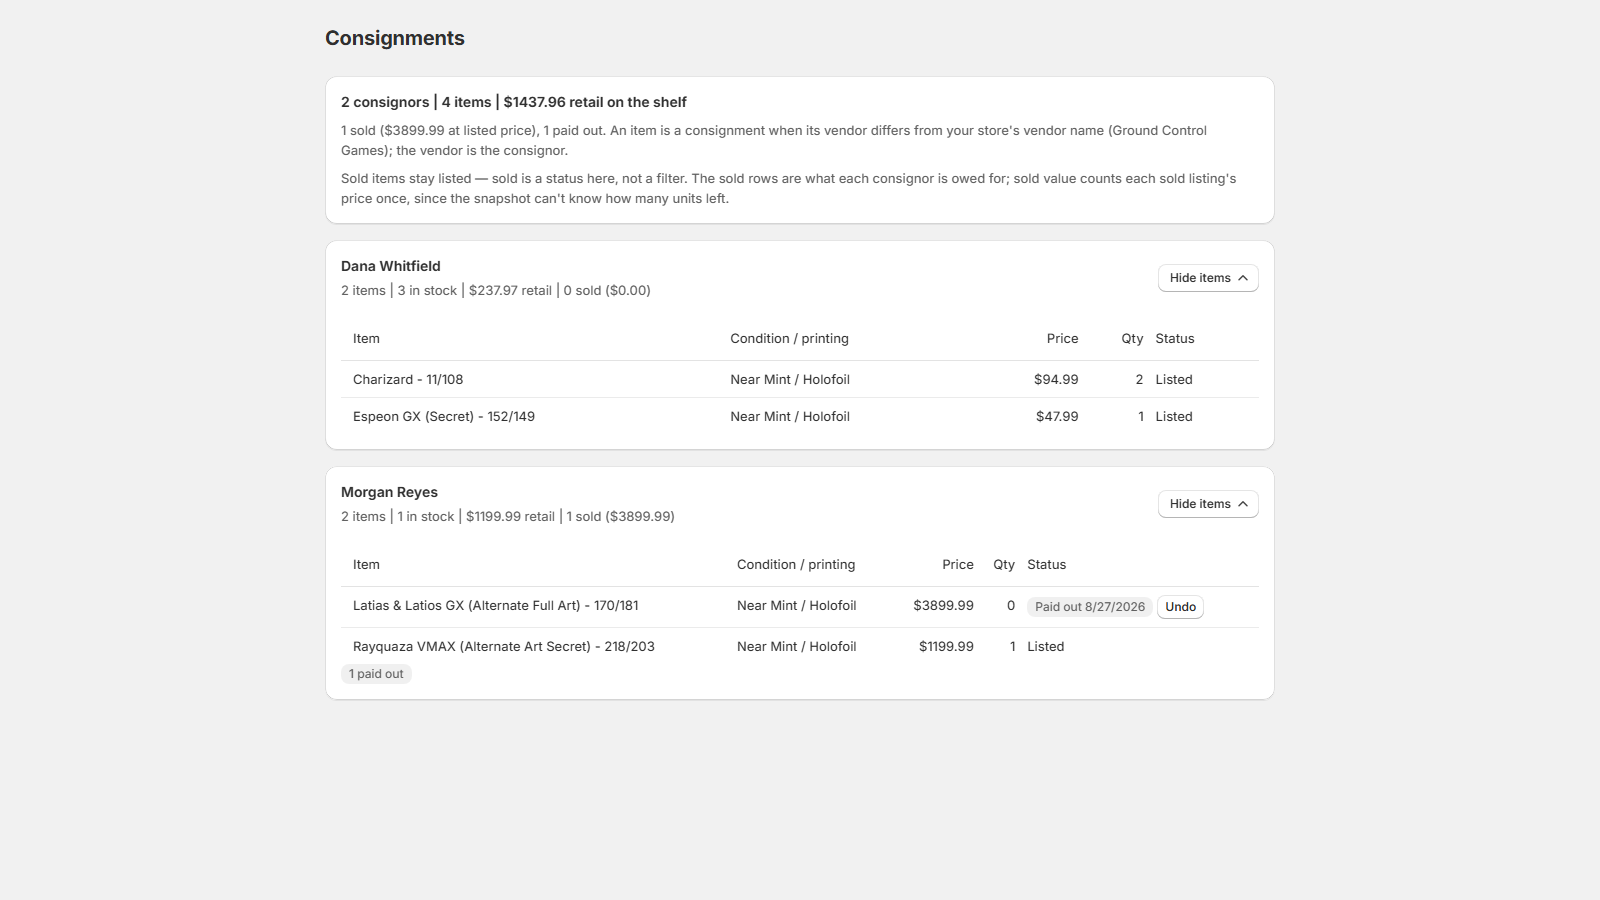
Consignments shows one group per consignor: items, units in stock, retail value, and the sold count with its value. Show items opens the item table: Item, Condition / printing, Price, Qty and Status. Each row reads Listed, Sold or Paid out.
3. Sold is a status, not a filter
Sold items stay listed inside their group. They are exactly what you owe the consignor for. Sold value counts each sold listing's price once, since the snapshot can't know how many units left. The group badge reads "sold — owed at listed price" until you settle up.
4. Mark items paid out
- On a sold row, click Mark paid out.
- The row shows a Paid out badge with the date; Undo removes it if it was a mistake.
- Watch the group badges split what's owed from what's settled: the owed count is sold minus paid out, next to the paid-out count.
Only a sold item can be marked, and marking twice keeps the first date. Paid-out marks are Card Vendor's own record. Nothing is written to Shopify.