 Card Vendor Guides
Cash bags, employees & approvals
Who took the buy, where the cash went, and who signed off.
1. Add your counter staff
- Open Settings → Employees.
- Type a Name, optionally a PIN (optional) (4–12 digits, a reminder to pick the right name at a shared terminal, not a lock), and click Add employee.
- Use Deactivate for someone who might come back. It takes them off the intake screen. Remove also keeps their past intakes attributed, so reports stay correct.
2. Record who takes each intake
With people on the roster, New intake on the Intake screen asks Who is taking this intake? Choose a name and click Start intake. The session then reads Taken by …, with a Change button to correct it while the intake is still open.
3. Read the per-employee buy report
It lives on the same Employees page, under Intake by employee: set From and To, choose Include (Completed intakes or All counter activity) and click Apply. You get totals plus a row per person: intakes, items, cash paid, trade given, and average cash rate. View intakes lists that person's sessions; Open shows one line by line.
4. Track the drawer cash
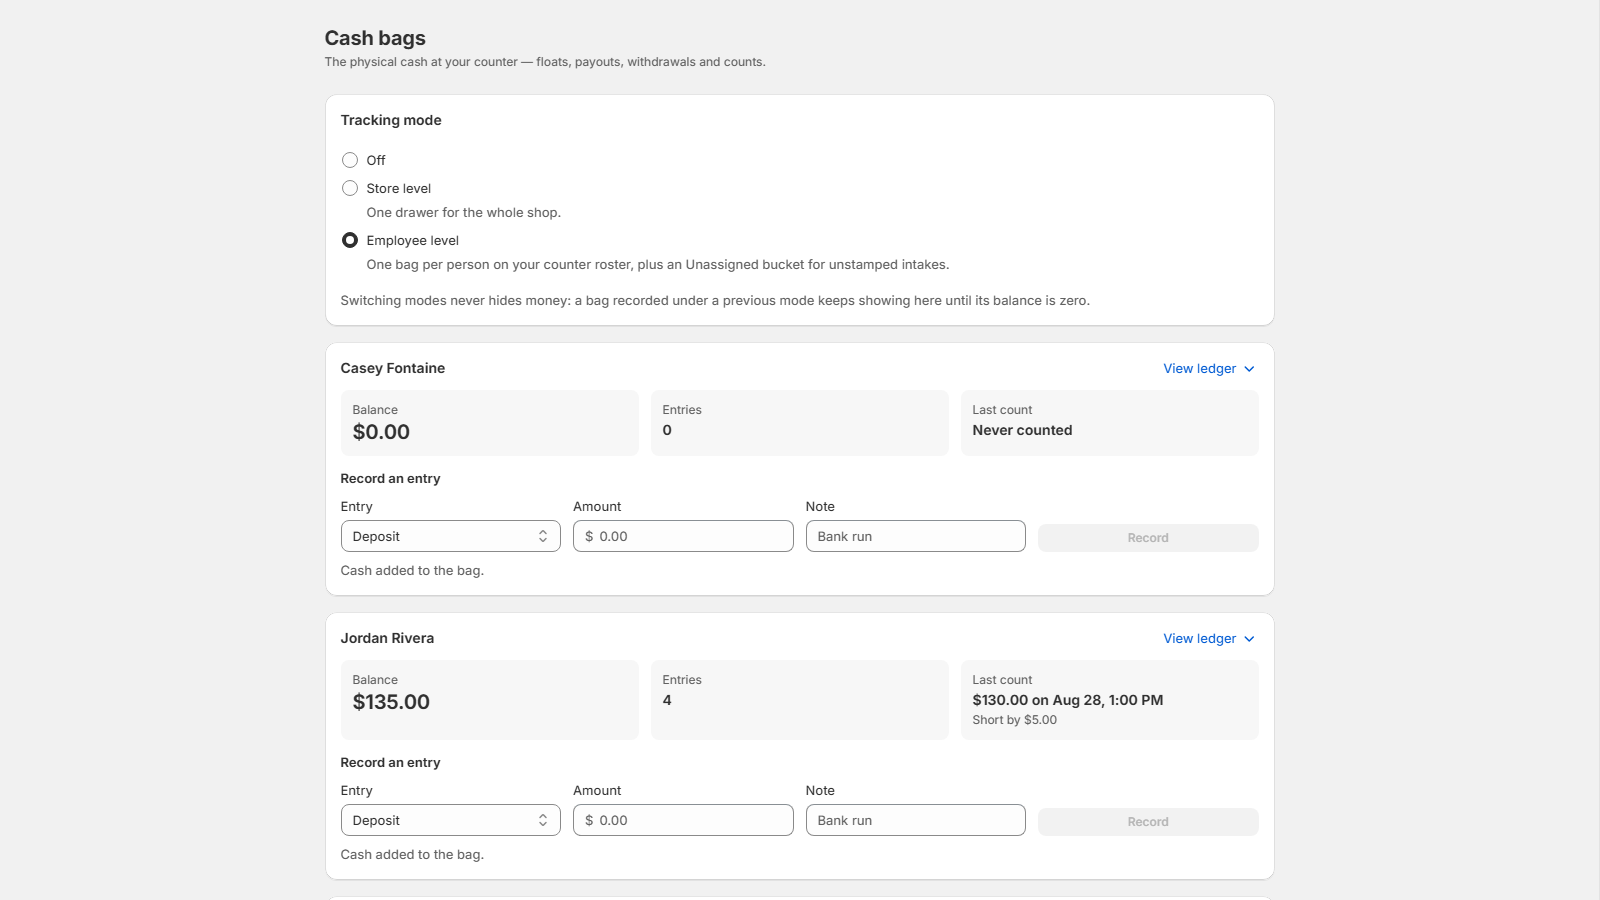
Open Settings → Cash bags and pick a tracking mode: Store level (one drawer for the whole shop) or Employee level (one bag per person on the roster, plus an Unassigned bucket for unstamped intakes). Every cash intake payout is recorded against the right bag automatically when a buy is pushed.
- On a bag, pick an entry: Deposit, Withdrawal, Set opening float, Adjustment, or Count.
- Type the Amount and an optional Note, then click Record. Type a withdrawal as a plain amount, without a minus sign.
- A Count stores what you physically counted without moving the balance; the bag then reads Over by, Short by, or On the money against the ledger. View ledger shows every entry and who made it.
5. Approve intakes remotely
Settings → Approvals holds the queue and the notification address: enter the Approval email address and click Save address. At the counter, each intake has an Approval section. Send for approval locks the intake as Waiting for the owner and emails you. From the queue, Review intake opens the real session with the submitted figures frozen: click Approve intake to clear it for Create in Shopify, or Request changes to type what needs to change and Send back to the counter, where the employee reads your note and clicks Resume editing. Editing an approved intake withdraws the approval. Different figures need a new decision. Tick Require approval on every intake to make sign-off mandatory rather than opt-in.